Wednesday, June 30, 2010

HARD WORK...but somebody has to do it!


first effort 10x17

Yesterday I had the idea of combining two of the fun things I do in the studio...quick sketching and clay prints.


Second effort 10x24

Sunday, June 27, 2010

CLAY...CLAY...CLAY

I'm taking a break from the watercolors to play with clay. Below are several more recent mono types, with the focus on the colors of Bologna. I haven't quite accomplished what I set out to do, but feel that I'm making progress. Will continue with the work over the next few weeks and allow it to evolve. It is in striking contrast to the tight watercolors I've been working on...but that's what keeps the days interesting.


Friday, June 25, 2010

CASTELLO ESTENSE…PART 5


Yesterday I wrote how the stress level rises as the work progresses...with the risk of messing up all the work with some stupid mistake. Today I allowed myself to be distracted and indeed "messed up". Fortunately it was something I could correct, and when the work is completed I will probably be the only one who will know about it. After years of creating art I've learned that an important skill is learning how to "recover" from the inevitable stumbles that occur.

The very left portion of the castle has been rendered too dark. After the photo was taken I moistened the area and lifted off the offending darkness.

CLAY MONO TYPES!

I returned from Italy resolved to get rid of the clay slab in the studio. I had neglected it for several months and had not done any printing for over a year. Well that did not happen, and yesterday and today I was once again working with the clay, trying to capture some of the color of Bologna.


Thursday, June 24, 2010

CASTELLO ESTENSE…PART 4


I expect it will take another 2-3 days to complete the first stages in the rendering of the Castle. The biggest challenge here is not to miss an area that should be masked, or to mask an area that shouldn't be. The further along I get in a painting like this, the more nervous I get about really screwing up, like letting paint fall somewhere on the piece and not see it until it dries; on one occasion I actually dropped a brush filled with paint on the middle of painting, ruining the entire piece.

Once I get all the paper covered the way I want it to be covered I can begin to relax. It's kinda like the new car, once it's been around the block awhile, a little nick or scratch is no longer a big deal (at least for some of us.).

Wednesday, June 23, 2010

CASTELLO ESTENSE…PART 3

With the background in place, the next step is to begin rendering the architecture. Because of the size and the amount of detail, windows, etc. I have masked out everything but the exterior areas of the same material and color. This will allow me put down a uniform wash of consistent color and value, working quickly enough to avoid water marks and other “blemishes” that can happen when covering a very large area of paper. Shadows and other variations in light and detail can be added later.

I will start on the left tower and work across the top of the structure to the right, repeating the process on the lower half by working on one component at a time.

Monday, June 21, 2010

CASTELLO ESTENSE…PART 2

I returned from Bologna knowing that my art from this trip was going to be focused primarily on the architecture and the soft colors of the region, and this meant that watercolors, with and without some pastel, would be the dominant media. For many years watercolor was my only medium, and architecture my only subject, so in some ways this would be a return to my first love.

Without formal art training my use of the medium basically evolved on its own, influenced by the art of one or two illustrators and my fascination with the urban environment. The result has been the frequent use of the architect’s “elevation drawing” to depict the subjects, and my commitment to clean lines and hard edges in the paintings, forgoing the loose, transparent washes that are usually the hallmark of watercolor. In other words my watercolors are usually very tightly executed, and to accomplish this it is necessary to spend a great deal of time planning the composition and the approach because of all the masking that is required. My goal is to share this with you as I work my way through the painting of the Castello Estense.

The watercolor below was completed in the early 80’s and is a good example of what I have been writing about.


Pennsylvania Academy of Fine Arts...wc...20x30

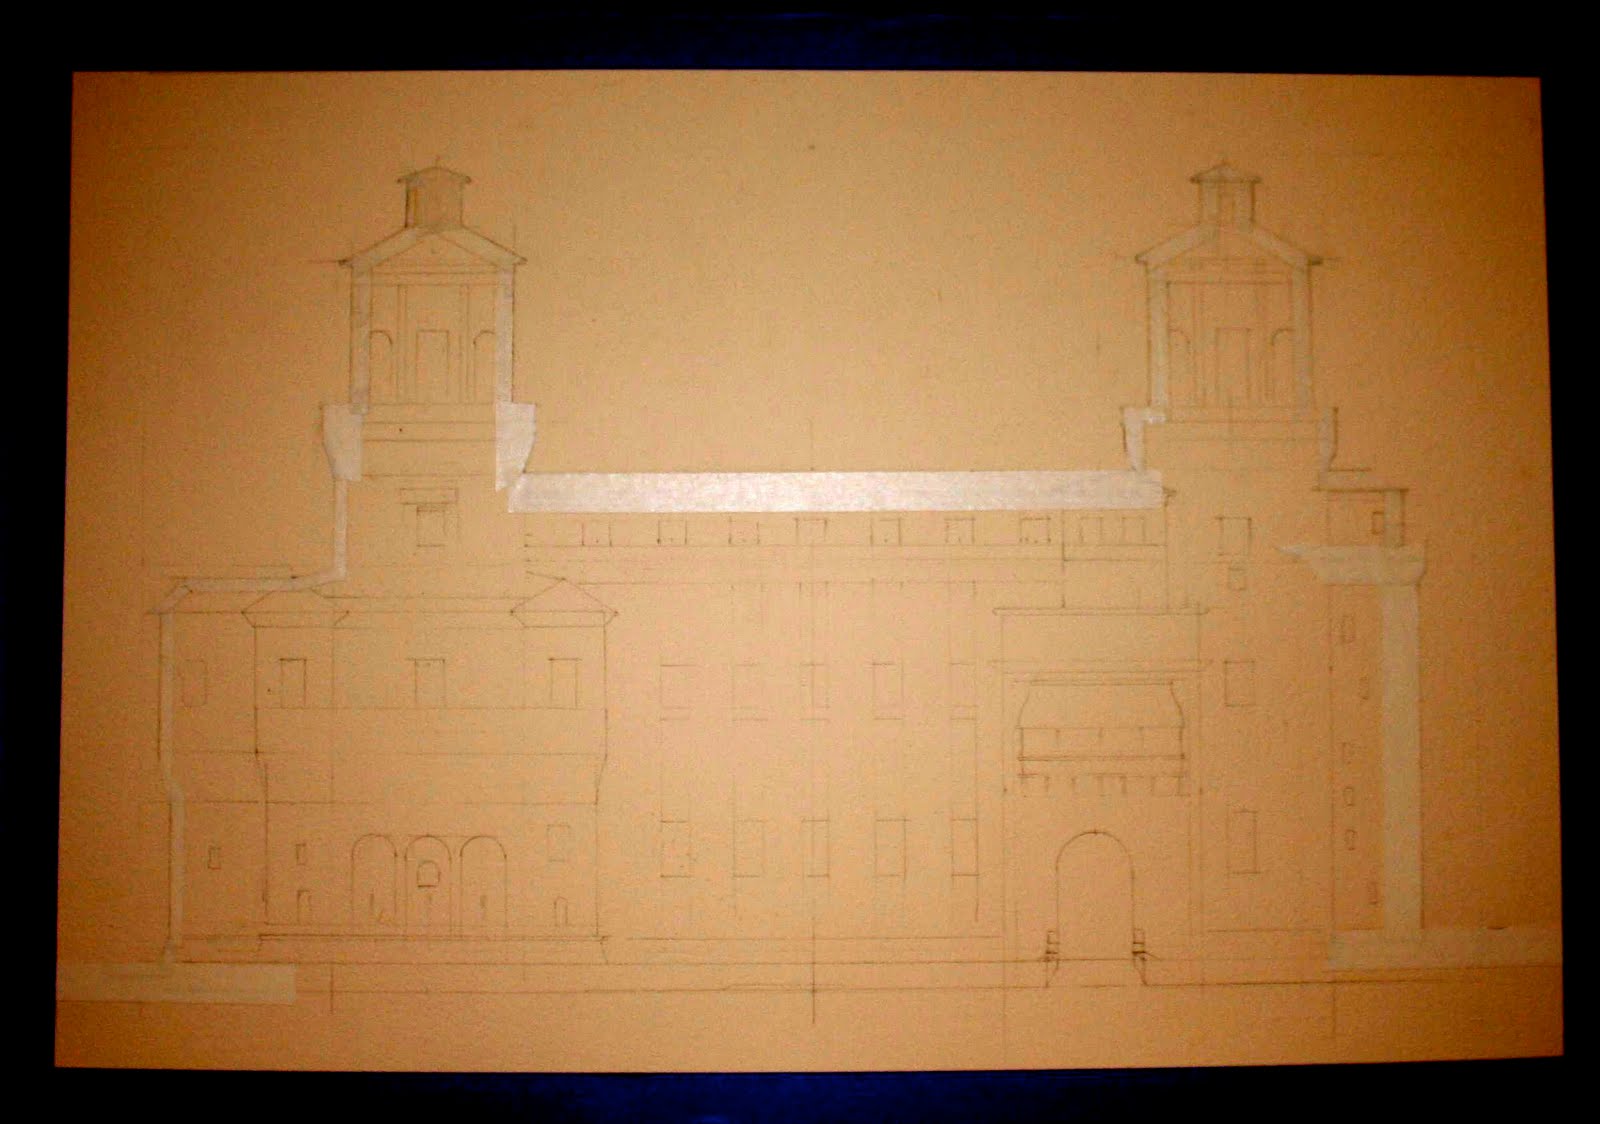
In this case I eliminated everything but the structure itself. In subsequent work I began placing the buildings against a tinted background...which I will be doing with the Castle. To do this I have completely masked the outline of the structure with artist tape. This will allow me to work the washes for the background without worrying about the paint getting into areas where I don’t want it to go.


It was necessary to alter the exposure of the photo in order to allow the tape to be seen.

Friday, June 18, 2010

CASTELLO ESTENSE…PART 1


A dear friend, who arranged to have his friend in Ferrara Italy be my host for the day of my visit, has asked me for a painting of the cities landmark structure, the Este Castle, also know as Castello Estense. This monumental structure located in the center of the city was built in 1385, and consists of 4 connecting towers surrounded by a moat. It overwhelmed me, and my camera, and though I did take photos from multiple angles I did not have a clear idea of how I would be rendering the structure.
I eventually decided on using my favorite approach…an elevation drawing. Since my own photos proved to be insufficient, I had to use additional pics from the internet. Because of its size, there were no straight on photos, and I had to create my drawing by extrapolating from the various images available.


The first task was to produce an aproximate 5 ½ x 8 1/4 “thumbnail” drawing with the proper architectural relationships. Once this was completed I used a proportional scale to layout the final drawing, the image measuring 15 x 24 “.

Because the pencil lines are rather light the color and exposure of these photos is a bit distorted in order to show the lines.